Defences
Defences are extremely important in successful dungeon design. Protect your dungeon and keep your minions safe. To build a defence, you need to place a blueprint, and then your Workers need to bring defence parts to the blueprint. Defence parts are created in the Foundry. You can also manually pick up parts from your Foundry and drop them directly on the blueprint. Dropping parts on a defence will also repair it if it has taken damage. The spell "Forge" can also construct and repair defences.
Regular Defences
Wooden Door
Cost: 500 gold
Parts: 1
Health: 1500
A simple door which only lets friendly minions through, but can be locked to stop them passing. Must be built between two walls. Doors count towards room Prop Efficiency (like Fortified Walls).
Augrum Wall

Cost: 500 gold
Parts: 2
Health: 1000, 750 wall after construction
Replaces a claimed tile with an incredibly strong Fortified Augrum Wall, which is highly resistant to damage. Takes a short time to unpack once complete.
After being fully constructed, it turns into a an actual wall with 750 health.
Alchemine

Cost: 500 gold
Parts: 2
Health: 2500
Creates a booby trap when a potion is placed inside it. The potion will explode and unleash its effects if an enemy gets too close. After depositing a potion you can pick it up again or slap to detonate it.
Blade Lotus

Cost: 1250 gold
Mana Upkeep: 5
Parts: 2
Health: 2750
The Blade Lotus will slice, dice, and knock back enemies within melee range. Toggle to inactive mode to keep it hidden so enemies pass over it, allowing you to trap them by reactivating it after they pass.
Bombard

Cost: 1500 gold
Mana Upkeep: 10
Parts: 3
Health: 1750
Launches flaming iron balls at nearby foes. Can be activated to toggle Overdrive mode which increases attack speed, but it will damage the Bombard with each attack.
Infernal Urn

Cost: 1500 gold
Mana Upkeep: 10
Parts: 2
Health: 1500
Breathes a torrent of flame at nearby enemies, setting them alight for a few seconds. Can also be activated to break the urn, which defuses nearby Brimstone (so it can be mined out), sells nearby Underminers, and banishes nearby Ember Demons back to their Rifts.
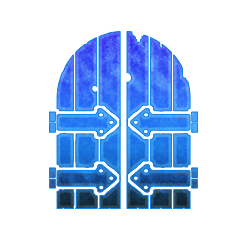
Portcullis

Cost: 1750 gold
Parts: 2
Health: 6000
A mighty door which only lets friendly minions through. Unlike other doors it doesn't need supporting walls, so can be chained together to defend large openings in your dungeon. Can be locked to stop friendly minions passing. Doors count towards room Prop Efficiency (like Fortified Walls).
Bone Chiller

Cost: 2500 gold
Mana Upkeep: 15
Parts: 3
Health: 2500
Emits a chilling mist that reduces the movement speed of enemies in a large area. Can be activated to unleash an icy blast which stuns them for a short time.
Rampart

Cost: 3000 gold
Parts: 8
Health: 7500
A protective barrier that can be placed around your existing defences, blocking movement and providing a large defensive boost.
Gargoyle

Cost: 5000 gold
Mana Upkeep: 10
Parts: 3
Health: 2500
A grotesque statue which fires a debilitating beam of energy at all foes in front of it, increasing the damage they take from other sources. Its aim can also be rotated by 90 degrees at a time.
Midas Door

Cost: 5000 gold
Parts: 3
Health: 1000
A solid gold door which only lets friendly minions through. Can be closed to make it impenetrable, using your gold reserves to pay the demon inside for any damage the door takes; when you can no longer pay the price it will be destroyed. Must be built between two walls. Doors count towards room Prop Efficiency (like Fortified Walls).
Glacial Door

Cost: 5000 gold
Parts: 3
Health: 4000 unlocked, 24000 locked
An icy door which only lets friendly minions through. Can be locked to gradually encase the door and neighbouring walls in ice, increasing its health and rendering the walls highly resistant to damage. Must be built between two walls. Doors count towards room Prop Efficiency (like Fortified Walls).
When locked it also turns connecting walls into Glacial Wall with 900 Health.
Sentinel

Cost: 5000 gold
Parts: 10
Health: 10000
A mechanical golden knight which once activated will tirelessly fight without need for rest or food, but will command a hefty sum at Payday. Can be activated manually, or it will activate automatically if an enemy gets too close. Golden minions can only be healed with the Gild spell.
Well of Souls
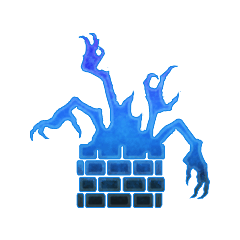
Cost: 7500 gold
Mana Upkeep: 30
Parts: 6
Health: 4000
This necrotic vessel will drain the life force of enemies that wander near, forming it into ghastly Revenants to defend your dungeon. Stores up to 5 Revenants which can be released by activating the Well. Revenants will burst forth on their own when the Well is full.
The Well of Souls will work through walls, which means you can construct devilish corridors to force your enemies to walk through while taking damage. They also work well any place where you can put them behind a corner so enemies can't damage them easily.
Storm Vortex
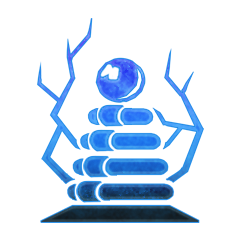
Cost: 7500 gold
Mana Upkeep: 30
Parts: 6
Health: 4000
Hurls powerful bolts of lightning at nearby enemies. Can be activated to toggle Vortex mode, which warps enemies back to their Dungeon Core. However the vortex is unstable so the defence will take damage each time it sends an enemy through, based on the strength of the victim (enemy Workers cause no damage).
The Storm Vortex is extremely powerful, and several of these can hold back a surprising amount of attackers, especially when powered up by a Garrison.
Unbuildable Defences
These defences can't be built by an Underlord. They sometimes appear as Empire defences, or as special defences on certain maps.
Possession Door

Health: ∞
An indestructible door that can only be opened while in Possession Mode. Any nearby Locked Fog of War will be cleared if this door is removed.
Core Door

Health: ∞
A magical doorway which only lets the owner's minions through. It cannot be locked, sold, claimed or attacked; but it is tethered to the owner's Dungeon Core, and will be destroyed if their Core is destroyed.
Siege Door

Health: 10000
A large, robust door.
Siege Door

Health: 15000
A large, robust door.
Ballista

Mana Upkeep: 15
Health: 800
Launches deadly bolts to skewer any enemy that gets too close.
Ancient Lever

Health: ∞
Controls an aged contraption. Can be activated by its owner, though its function is unknown.
Stone Knight

Health: 10000
A ceaseless warrior that requires no rest or food. Can be activated manually, or it will activate automatically if an enemy gets too close.